cost to paint soffit and fascia

cost to paint soffit and fascia

July 2022 For a basic project in zip code 47474 with 125 linear feet the cost to Paint Fascia starts at 371 - 764 per linear foot. Cost to Paint Fascia and Soffit Itll run between 250 and 650 per linear foot to paint either the fascia or soffit.


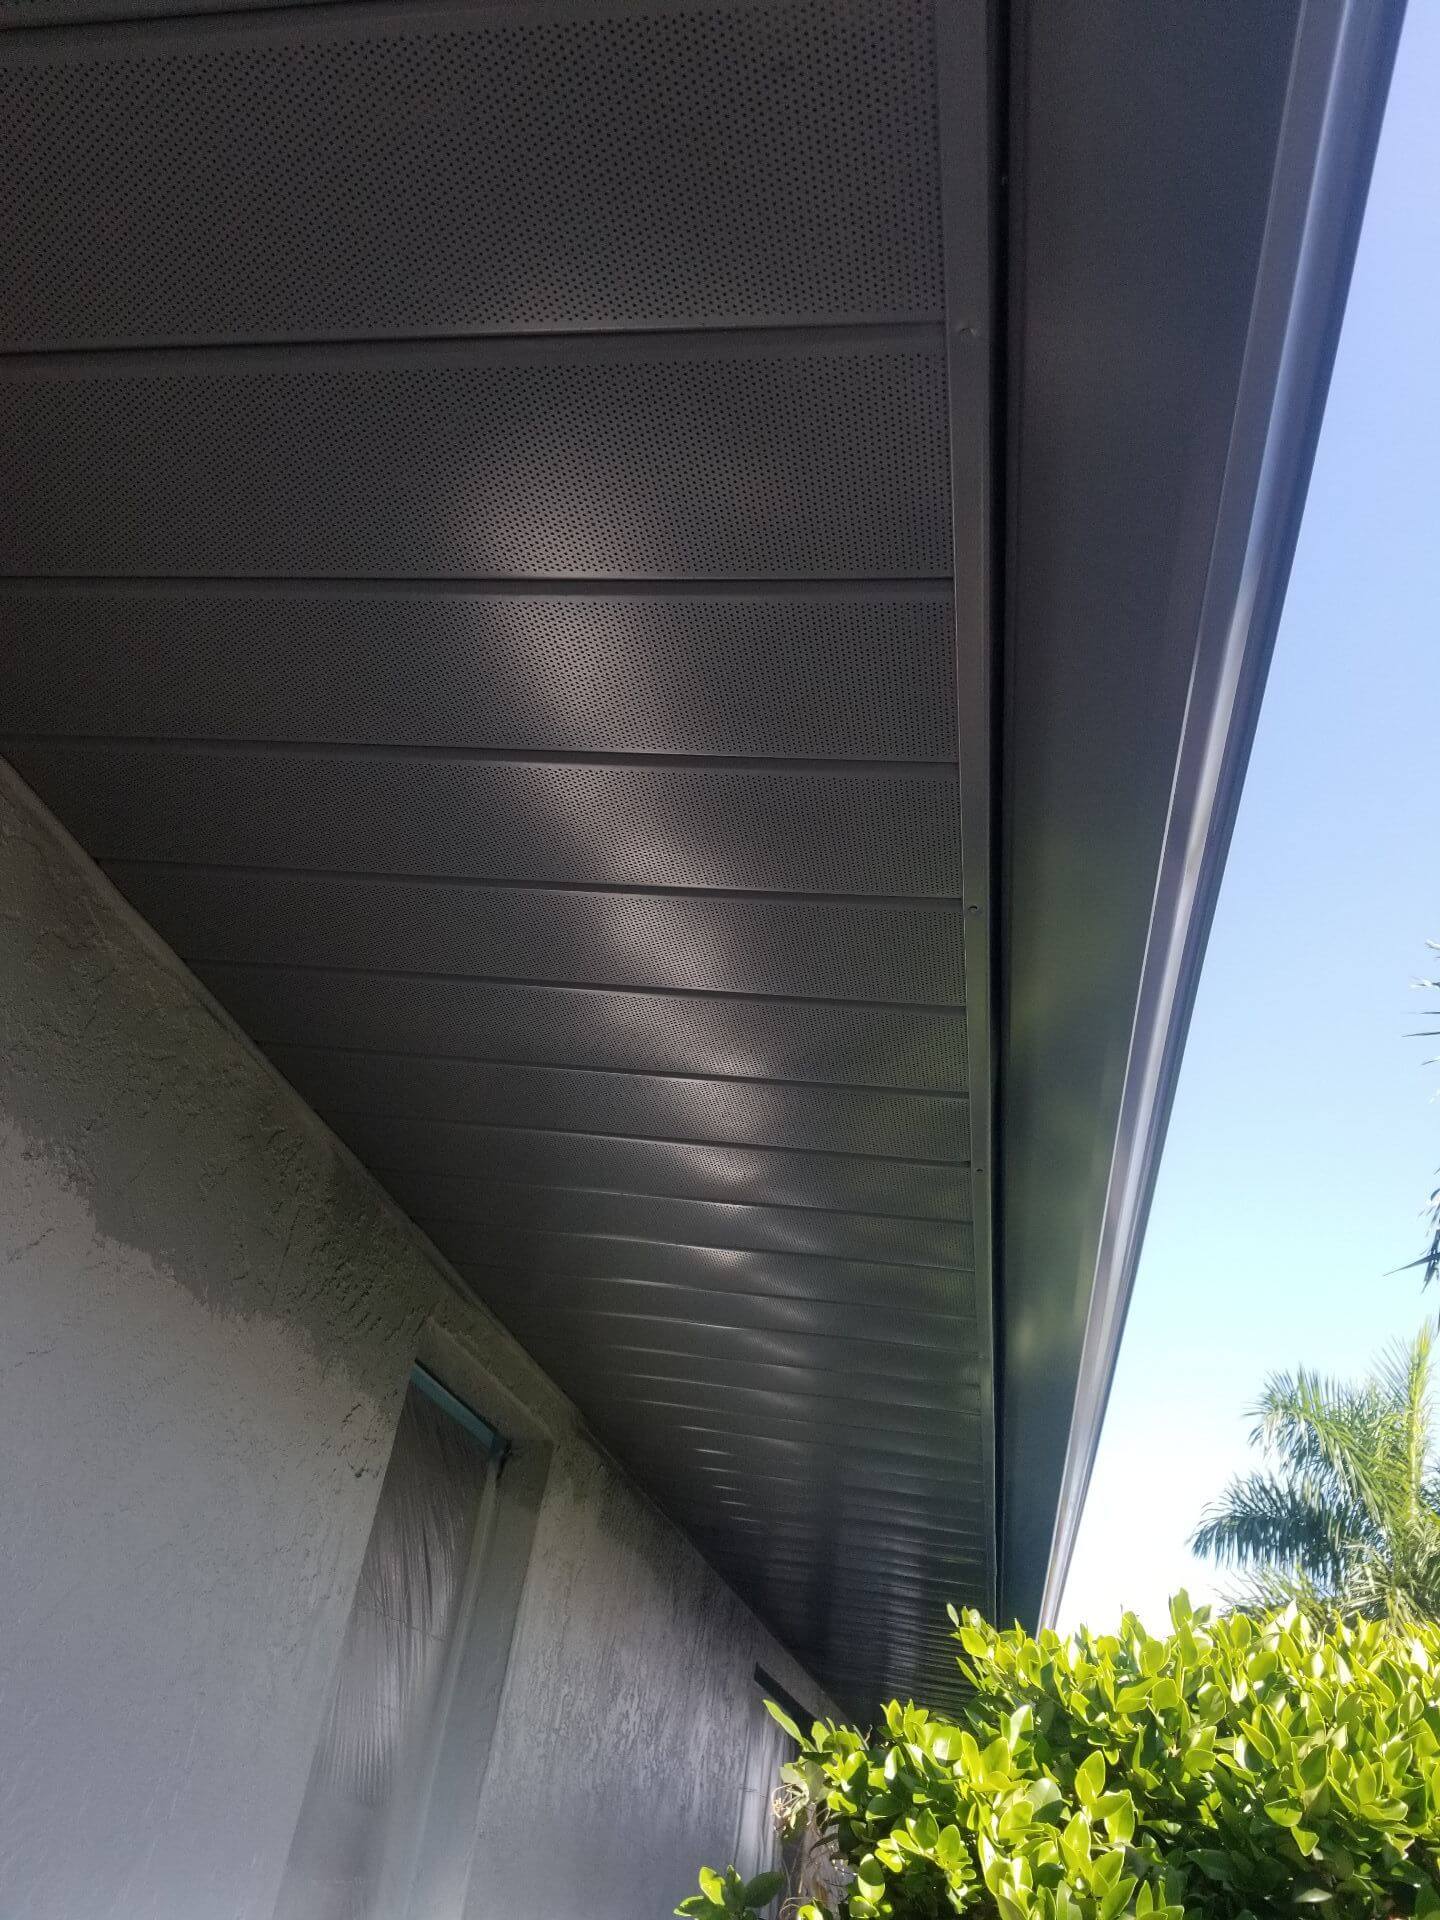
Aluminum Soffit Painting Ron S Painting

Here is a breakdown of the labor cost of painting exterior trim in linear feet including materials.

. A typical 125 linear foot project costs 46340 with a range of 30773 to 61907. The total price for painting a fascia runs between 500 and 1000 on average. On average it costs approximately 100 per metre to replace fascias and soffits or 50 per metre if you cap over your existing fascia boards.

All Sizes In Stock. Depending on the material one linear foot of soffit would cost anywhere between 7 and 14. The average cost of painting fascias and soffits is usually in the range of 700-1000 depending upon what material the boards are made from how much prep work is required and what type of house you have.

Fascia per 12-foot length 1 to 3 for wood 1 to 8 for composite 5 to 8 for vinyl 8 to 25 for aluminum Soffit per 12-foot length 2 to 15 for aluminum 4 to 20 for vinyl 25 for steel 11 to 20 for wood Additional Costs. It costs between 20 and 40 per metre to paint a fascia and soffit with the total cost likely being in the region of 850. In this case spray painting may be a more effective approach to get an even finish on your fascia boards and soffits.

How much does it cost to paint fascia and soffit. I dont see how the job can cost even close to 7K even if scaffolding is needed. Anthracite UPVC Fascia Boards Trims.

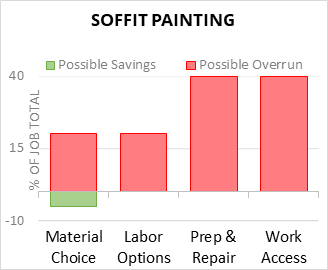
Cost Factors of Painting Soffits and Fascias Several things can affect the overall cost of painting your fascias and soffits. Ad Anthracite Grey Black White Fascia Boards And Capping Boards. And the price of fascia and soffit as of writing is as follows.

Average Cost to Paint Exterior Trim Per Linear Foot Gutters and Downspouts 6-7 Wood Soffits and Fascias 6-7. You might be considering whether its worth the trouble to paint your soffits and fascias or just have a professional painter do it. Anthracite UPVC Fascia Boards Trims.

Hi there I am new to this so please forgive me if I have posted this incorrectly but I am looking for some advise. Ad Anthracite Grey Black White Fascia Boards And Capping Boards. The table below outlines the approximate cost of getting your fascia and soffit painted.

This cost difference is reflective of the relative complexity of the removal and installation process for each type of trim. 400mm soffit board is about the same price. Use a good quality exterior paint which will hold up to the elements for years.

Use the tip of the bristles to work the paint under the gutters and onto. PVC soffit and fascia boards are a durable cost-effective option for your property. The average cost for a professional soffit and fascia painter is around 150 per day.

For a basic project in zip code 47474 with 120 square feet the cost to Paint a Soffit starts at 420 - 895 per square foot. Actual costs will depend on job size conditions and options. To estimate costs for your project.

Soffit per 12-foot length. Then catch the drips on the sides to even out the paint on the trim and back side of the fascia board. Applying paint to PVC soffit and fascia boards can leave brush marks.

To estimate costs for your project. Depending on the size of your home the work will normally take between 2-4 days to complete. ATM I am replacing 45m of fascia no soffit on one side of my house not a bungalow.

I started painting the soffit by running the paint brush down the middle of the board. The average costs for both fascia and soffit would be anywhere between 18 and 55 per linear foot. Itll run between 250 and 650 per linear foot to paint either the fascia or soffit.

Generally due to the nature of exterior wood you may expect to have to paint these every 5 or so years if you use a standard paint although using a good-quality paint such as the ones our experts have recommended you may get over 10 years. Set Project Zip Code Enter the Zip Code for the location where labor is hired and materials purchased. Many customers have asked us if PVC soffits and fascias can be painted.

The durability of paint applied to fascias soffits or bargeboards depends on the quality of the paint and the weathering it undergoes. Fascia installation costs range from 6 to 20 per linear foot while soffit installation tends to be cheaper than fascia at 1 to 3 per linear foot. The total price for labor and materials per linear foot is 371 coming in between 246 to 495.

225mm plastic fascia board is about 10m delivered. The national average materials cost to paint fascia is 106 per linear foot with a range between 059 to 152. Set Project Zip Code Enter the Zip Code for the location where labor is hired and materials purchased.

On my own - one man with a ladder. Depending on the size and type of home that you have you can expect this work to take around 3-4 days to complete. For a house size such as a bungalow youll be looking at estimated installation costs of between 2700 to 5000 and an expected time allowance of between one to two days for installation.

All Sizes In Stock. Actual costs will depend on job size conditions and options. For example painted plywood costs 6 to 11 per linear foot while aluminum would cost anywhere between 8 and 14 per linear foot.

how to keep ostomy bag from leaking

how to keep ostomy bag from leaking

For people living with a colostomy urostomy or ileostomy ostomy pouch leakage can feel like a nightmare. Ostomy bag leaking will occur if the ostomy isnt.


20 Failproof Tips To Prevent Your Stoma From Leaking

The convexity pushes on the skin around your stoma and helps the stoma.

. This and more leg room will encourage the stool to fall properly. It is important to change your stoma bag on a regular basis before it is susceptible to leakage. In this case the redness is located in the area where the offending product is.

Might be of some help to wear a. A properly fitted ostomy appliance should keep your stool or urine in the bag without breaking the seal between your wafer and stoma. The CliniMed Careline team can also talk through your stoma care routine with.

How to Prevent Leaks with Your Ostomy Bag 1. If you are not dressed appropriately. Make sure you are drinking lots of water and lower your caffeine intake.

Had lots of leaks until I. You are not wearing proper clothes. Sandra Williams March 18 2015 at 303 pm.

Tip You can either use a moldable ring or you can smooth out your skin surface by using a paste like the Brava strip. Make sure to have the waistband sit just above the stoma applying pressure to the top of the bag. Last year I had a skin ulcer above my stoma and had to keep an ostomy belt on 247 to prevent leaking at the top.

Making sure your ostomy pouch adheres properly will go a long way towards preventing leaks. An overfilled or overweight pouch causes undue strain on the base plate attached to the skin. Put a high priority on ostomy skin health.

Follows body movements and provides a secure fit for individual body shapes. Here are some tips to best manage leaks with an Ostomy. Ad Ostomy appliances for every body profile.

If your stoma is flush with your skin or it retracts below the skin you may need to use a convex wafer. Even tiny creases can cause output to seep under the ostomy barrier. Here are some tips for staying leak-free.

Get a free sample now. Whether its at night or during the day a leakin. Also increase your intake of fluids.

Get a free sample now. This prevents the weight of the stool from pulling the wafer off your body. Yesterday I was getting a hair cut stood up to pay and realized that I was leaking.

An ostomy belt might help. A barrier ring is a flexible ring made out of a waxy material that fits around your stoma to fill in the gap between the edge of your wafer and your stoma thus preventing leaks. 108 thoughts on Out of the Bag.

Dealing with ostomy leaks. A less common cause for red irritated skin around the stoma is a reaction to the products in the pouching system. Its important to get fitted with a skin barrier that fully covers the stoma with no skin showing.

When you have an ostomy avoid wearing tight. Drain your ostomy bag as much as possible to avoid it becoming full leading to an overflow or leakages. Due to many factors leaks can.

Get a Proper Fit. Follows body movements and provides a secure fit for individual body shapes. Put some air into the pouch by blowing into the pouch prior to application then apply a filter cover this will make sure some of the air remains inside the pouch to prevent any.

Stay clear of tight clothes as they tend to cause loosening of the edges of the ostomy appliance. When I first got my ostomy my nurse suggested emptying it when it is about 23 full. If you are unsure what might be causing your bag leaks consult your Stoma Care Nurse in the first instance.

Change to New Products Stomas come in all shapes and sizes so maybe the particular product youre using isnt the. Ive had a diversion Ileostomy since 614. You may want to increase your intake of fiber pending your doctors approval.

Ad Ostomy appliances for every body profile. Ad Find Deals on ostomy support belt in Health Care on Amazon. Not the wafer with a normal leak but the bag itself at the bottom velcro closure.

how to remove mannequin from photo

how to remove mannequin from photo

So ghost mannequins directly influence the sales of clothing goods. Now its time for refining the details of that mask you just created.


Pixc Remove The Background From Your Product Image Ghost Mannequin Fashion Still Life Selling Photography

Change the shooting parameters of the camera if the light intensity decreases or increases.

. Aim the camera lens at the subject to be photographed and press the shutter button halfway down. The ghost mannequin effect allows you to take multiple photographs of a product on a model or mannequin and then combine the photos to remove the model or mannequin in post-production processing. Moreover the ghost mannequin service is necessary to improve the level of a company.

You will see that your image makes up the locked background layer. Image Editing helps you to edit ghost mannequin product photography used for E-commerce websites. The invisible mannequin service is the advanced image manipulation method.

Remove the extra tapered and folding area. Go ahead and delete the rest of your. But after removing the mannequin sleeves lost their natural look.

Click OK on the refine edge command and voila. All it takes is a plan and Photoshop instructions. Here the ghost mannequin plays a cognitive part.

The ghost mannequin effect also known as the hollow man effect or invisible mannequin is commonly used in clothing photography to remove models or mannequins from the apparel images. You can find it under the select menu. Your mask is placeduse the layer via cut command to finish the isolation process.

You need to gain the trust of the customer to get the desired output. If it is separable remove it from the neck area to make visible the back part. Make sure your Layers panel is open.

Up to 7 cash back Hello Im Mohiuddin Ahmed a highly professional e-commerce image editing specialist from Bangladesh. Just follow this video and you will be able to do it b. E-Shop For any kinds of e-commerce shop you need to take invisible mannequin shots of your clothes.

Remove Unnecessary Parts of the Foam Board Layer. Well show you how. Photoshop tutorial for E- commerce photographer and Retoucher Image editor.

You need to put your camera on the tripod and place the clothing item on the floor or table. Step 6- Take Pictures Without A Mannequin. Generally image editors are provided with a separate image without mannequins a part of which is added around the neck to get a perfect.

Edit to create a ghost mannequin effect. Firstly ensure a mannequin with longhand because a handless mannequin is not suitable for such a products photo. Hello GuysHope you are doing wellIf you want to remove any object from your picture and you dont know how to remove it then dont worryIn this video I.

So this service is needed to remove the mannequin from the hollow part of the sleeves and provide a ghost effect. Then press the button to take a photo. Services I offer are Clipping path Add or remove background Hair Masking Ghost Mannequin Shadow reflection Cropping resize Product retouching E-Commerce image editing.

The refine edge tool is perfect for this task. Open the image of the front half in Photoshop. This is the final step.

In this case we can remove the mannequins and add the neck to the corresponding images. Put the shirt on the mannequin. Give the camera some time to focus.

If you need use some pins. The ghost mannequin effect lets you take several shots of a product on a model or mannequin then combine the photos using photo retouching to remove the model. Here is the guide showed how one can remove a mannequin from a clothing by using Adobe Photoshop Tool.

If youre unsure stick to the rule of thirds and put your clothes on the 3X3 frameworks gridlines. Place your light source in a place that looks neutral. The actual color of your dress should be portrayed in the picture.

The result is a lifelike image that keeps the focus firmly on your product. But the process is dependent on some fundamentals. Howeverremoving the mannequin from the photo is an easy task.

Mannequin removal is one of the most complicated services among all image retouching services. Ive been working as a freelance graphic designer for 8 years. Import your images to your computer and open up Photoshop then follow these steps.

Then adjust the positioning of the foam board layer and adjust its proportions so that it fits perfectly behind the mannequin layer just below the shoulder in a rounded curve. First graphic artists have to remove mannequin from the clothes and then the empty patches need to be repaired. Place the clothing in the middle and adequately line the shoulders.

Removing The Mannequin From The Photo Sellers opt to remove the mannequin form the image to create depth in their product images. Read more about related service of Invisible Mannequin. Maintain the same white space on each side by keeping the clothing lines straight and considering the symmetry of the edges.

You need to follow those rules to execute an accurate editing on your images. Organize the layers so that the foam board image is lower than the mannequin image. After removing the mannequin the product image will create an illusion that the invisible mannequin still wearing the long sleeve t-shirt.